

Most Australian homeowners know they want cameras outside, but stall when it comes to deciding exactly how many to buy and where to put them. Mount in the wrong spot and you end up with footage of a fence panel while the path along the side of the house stays unwatched. Get it right, and four or five well-placed cameras can cover the vast majority of realistic entry points around a typical suburban home.
This guide focuses on practical outdoor security camera placement tied to how people actually approach and move around an Australian property. By the end, you will be able to sketch a simple camera plan, choose specific mounting spots, and know which situations are worth a call to Smart Security for expert input.
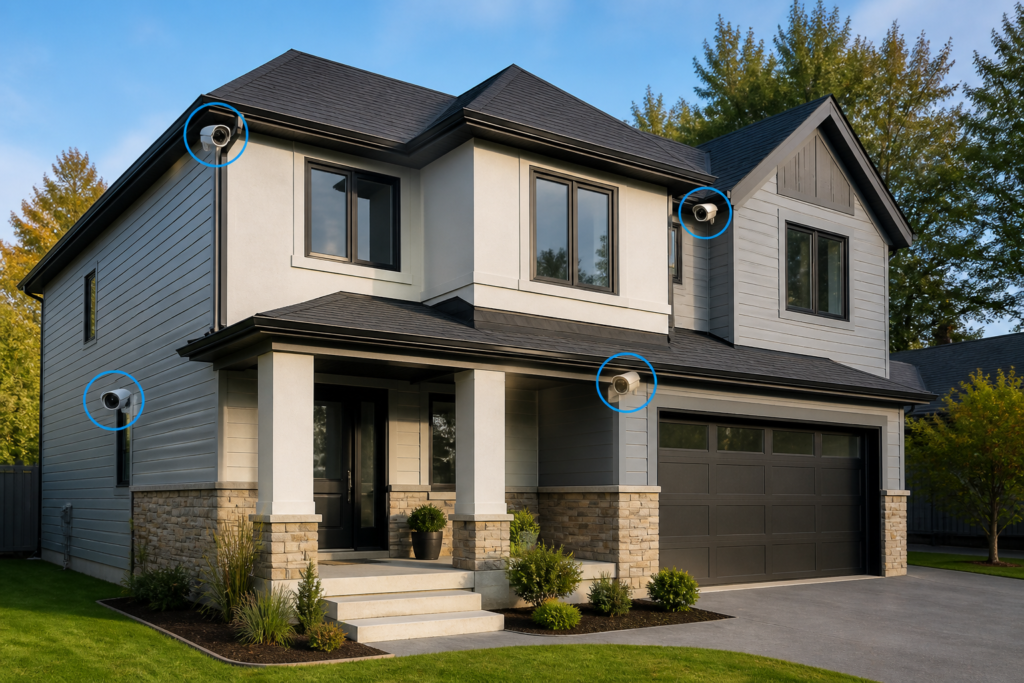
Map your property and prioritise the key outdoor camera locations
Before buying anything, grab a piece of paper and sketch your home’s footprint from above. Mark every external door, the driveway and garage, ground-floor windows, side paths, rear gates, and any outbuildings. This sketch becomes your planning document, and it immediately shows you where the gaps are.
For most detached suburban homes, covering 80 to 90 per cent of realistic entry risk comes down to five areas: the front door, other external doors (back, laundry, side), the driveway and garage, the back garden and patio, and side access paths. Here is how to think about each one.
Front door. Research consistently places the front door as the most common entry point for intruders. Position a camera or video doorbell 2 to 3 metres above the door, angled to capture approaching faces and the full path to the door, not just the step. You want to see who is there before they reach the threshold.
Other external doors. A back door or laundry entry that sits out of sight from the street is an obvious target. Mount a camera 2.5 to 3 metres high, slightly off to one side so the door swing does not block the lens, and angle it to cover both the doorway and a metre or two of the path or deck leading up to it.
Driveway and garage. A single camera above or beside the garage door, looking down the length of the driveway, is often the best-value spot on the property. It covers vehicles, the garage entry, and anyone approaching from the street or laneway.
Back garden and patio. Position a camera on the rear wall or under the eave looking back across the yard toward the fence line. The goal is to see anyone who comes over the fence or through a rear gate, not just to watch the patio furniture.
Side access paths. These are the most commonly overlooked blind spot. A narrow passage between houses is the natural route from front to back without passing a street-facing door, so a camera mounted at 2.5 to 3 metres and aimed along the fence line solves this gap with a single device.
If budget is a constraint, a simple tiered approach helps: good coverage means front door and rear entry; better adds the driveway or a side path; best means all five zones covered. Match the tier to your house size, layout, and what you can realistically afford right now, knowing you can add cameras later.
Outdoor security camera placement rules: height, angles and overlap
Height is the first thing to get right. Mounting cameras at around 2.5 to 3 metres off the ground (roughly 8 to 10 feet) strikes the right balance: high enough to be out of casual reach and hard to tamper with, but close enough to the action that faces and number plates are still readable. Cameras pushed up to roofline or second-storey height often produce footage of the tops of heads, which is rarely useful.
Angling for faces requires more care than most DIY guides suggest. Keep the downward tilt to around 15 to 30 degrees, because if the lens points too steeply at the ground you see shoulders rather than features. A simple test: stand where a visitor or delivery driver would normally stop, then check the live view on your phone. If you can see your own face clearly, the angle is right.
For driveways, aim the camera along the length rather than straight down, so the front or rear of vehicles and their number plates are in frame. A camera staring at a car bonnet tells you very little.
Corner mounting can be efficient. Placing a camera on a building corner allows one device to cover two sides of the house at once, and the key is to overlap the fields of view slightly between adjacent cameras so there is no gap where someone could stand unseen.
There are a few common mistakes worth avoiding: mounting too high, as noted above; pointing across very wide open areas where image detail dissolves with distance; and aiming straight at a busy road, which triggers constant motion alerts and trains you to ignore notifications. Knowing how to position your outdoor cameras in the right place also means checking, before you drill, for gutters, downpipes, pergola posts, overhanging trees, and dense shrubs, because any of these can block the view or, at night, bounce infrared light back into the lens and wash out the image. Trim foliage or shift the mount a few centimetres if needed.
Finally, before committing to a hole, tape the camera temporarily in place or have someone hold it at the planned height, then walk the expected approach paths while watching the live view on your phone. Only drill once you are satisfied with what you see.
Work with sun, shade and lighting for usable footage day and night
A camera in a perfectly chosen location can still produce poor footage if the light is working against it. In Australia, where direct sun is intense for much of the year, the direction the camera faces matters almost as much as where it is mounted.
Avoid pointing cameras directly east or west where possible. Low morning and afternoon sun shines straight into an east- or west-facing lens, silhouetting anyone approaching and washing out the image entirely. A north- or south-facing angle typically gives more consistent image quality throughout the day because the sun stays to the side rather than dead ahead. Mounting cameras under eaves where possible also protects the lens from rain and direct sun glare.
Watch for reflective surfaces too. Large windows, pool water, and light-coloured metal roofing can produce strong daytime glare that confuses the exposure, and at night they can bounce infrared light in unexpected directions. If a bright surface is unavoidable, shift the camera off-axis so the reflective area falls at the edge of the frame rather than the centre.
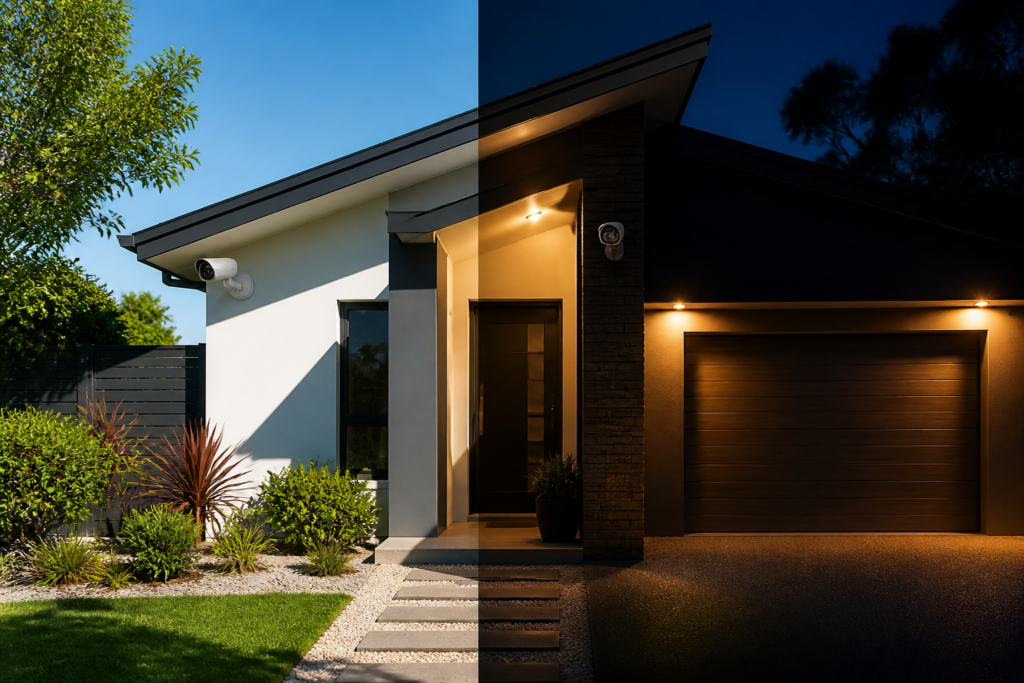
At night, cameras do not work alone. Pairing each camera location with existing or new outdoor lighting, whether a porch light, a sensor-activated floodlight, or LED strip lighting along a path, gives the camera something to work with when motion is detected. This is especially important for driveways and side passages where ambient light is often zero.
Infrared night vision has its own quirks. Light-coloured walls and fences reflect IR well and can improve image quality at range, but if a wall or post sits within 30 to 40 centimetres of the lens it bounces IR straight back and overexposes the whole scene. Check night vision performance in every location, not just daytime footage.
If you are adding garden lights, deck lighting, or a motorised gate as part of a renovation, plan camera positions at the same time so that people and vehicles are lit from the front. A light source directly behind your subject creates a silhouette, which defeats the purpose of having a camera there at all.
Respect neighbours and the law when placing outdoor cameras
In Australia, homeowners are generally entitled to monitor their own property with cameras, but a few practical and legal boundaries are worth keeping in mind. This is general guidance only, not legal advice; if you have specific concerns about a placement, check current state or territory guidance or seek independent advice.
The core principle is to aim cameras at your own doors, fences, paths, and driveway. Where possible, tighten the field of view or adjust the angle so that a neighbour’s yard, windows, or pool area are not the main subject of the frame. Some incidental capture of a shared driveway or street is usually unavoidable and generally accepted, but deliberately framing a public footpath beyond what you need to see who is approaching your property is worth reconsidering.
Neighbour relations matter too. If a camera lens points anywhere near a shared boundary, a quick conversation before installation goes a long way. Let close neighbours know you are adding cameras and be open to adjusting the angle if they raise a reasonable concern, because most issues at the boundary come down to a few degrees of adjustment.
If you live in a strata or body corporate property, check the by-laws before mounting anything on a shared wall, fence, or common area. Strata rules vary significantly and some complexes require committee approval for camera installation.
Finally, a visible CCTV notice at the front gate or main entry is good practice. It signals to anyone approaching that recording is in place, which serves both as a deterrent and as a sign that you are being transparent about surveillance on the property.
Tie camera positions into your wider home improvement plans
The best time to plan camera cabling and power is when other exterior work is already underway. If you are painting, rendering, reroofing, adding a deck, or installing a gate or pergola, doing camera prep at the same time means cables can be concealed before surfaces are finished, saving you from re-drilling through new cladding or plasterwork later.
For cabling, think about running low-voltage or data cables through the roof space, under eaves, or in conduit alongside existing runs such as downpipes or fence rails. Plan any wall penetrations before insulation, new ceilings, or exterior cladding goes in, because it is far easier to thread a cable through an open wall than to chase it through a finished one.
Power is worth sorting at the same time as other electrical work. If an electrician is already on site installing lighting or a new circuit, add outdoor power points or junction boxes near your planned camera clusters: the garage eave, the back patio, the side passage entry. This eliminates visible extension leads and keeps the installation neat.
Wi-Fi coverage is often the unplanned surprise. Check signal strength at each planned camera location before you mount anything, because far corners of the block, through double-brick walls or across large gardens, can have weak signal that causes cameras to drop frames or go offline. Factor in a mesh Wi-Fi node or extender, or consider wired camera options for those spots, as part of the renovation budget rather than as an afterthought.
Different exterior surfaces need different fixings. Brick, render, timber fascia, metal eaves, and fibre-cement sheeting all require appropriate plugs, screws, and sealant to keep a mount secure and weathertight over time. If you are recladding, pre-plan backing blocks or conduit before the lining goes on.
Think about how other upgrades interact with camera positions too. New perimeter lighting, a motorised gate, an intercom, or a new alarm system all affect where cameras should ideally sit. Planned together, these systems complement each other; planned separately, devices can end up blocking each other’s field of view or duplicating coverage in one area while leaving another completely unwatched. Smart Security’s expert positioning resource is particularly useful at this stage: take your sketch and your renovation scope, and cross-check the camera plan before you start buying hardware or drilling.
Turn your sketch into an action plan, and know when to call Smart Security
With your sketch in hand, run through a final checklist before you buy anything or book an electrician. Every external door should have a camera covering it. The driveway or garage should have at least one camera looking down its length. Side access paths should be on the plan, not treated as an afterthought. Every camera should sit at 2.5 to 3 metres with slightly overlapping fields of view so there are no gaps between devices.
Next, mark on your sketch which locations feel straightforward as DIY and which are more involved. Mounting a camera under a single-storey eave, on a low patio wall, or on a timber fence post with a nearby power point is well within reach for most homeowners with basic tools, and attaching a wireless camera to a brick wall with the right plugs and a drill is not significantly harder.
Some situations are worth handing over to a professional. Multi-storey placements that require ladder work on steep or slippery rooflines carry real risk. Long cable runs through roof spaces or under concrete paths need experience to do neatly and safely. If you want cameras to integrate with an alarm system, intercoms, smart locks, or access control at a gate, getting the wiring and configuration right from the start is far more efficient than retrofitting it later. These are the cases where Smart Security’s expertise pays for itself quickly.
The practical next step is straightforward: take your sketch and walk the property with your phone. Stand where each camera would be mounted, hold the phone at that height, and check the viewing angle and signal strength in each spot. Adjust the plan where needed, note which locations need an electrician or a cable run, and then either proceed with the DIY-friendly spots yourself or reach out to Smart Security to have the full system optimised and installed correctly from the start.
 Admin
Admin